
5 Series (1988-1995)
| socket (5 mm Allen key) | |
| ratchet wrench | |
| wrench (32 mm open-end) | |
| hammer | |
| torque wrench | |
| screwdriver (flat-blade) |
1x Fan Clutch
Check for damage to the fan blades.
Failure Symptoms:
If you encounter problems the engine temperature starts to climb whenever you are driving slowly or stuck in traffic on a hot day, but everything is fine as long as you drive along the roads – then your viscous fan clutch needs to be replaced.
Removing The Viscous ClutchIt’s usually easier to remove the fan shroud together with the fan and clutch but it’s not absolutely necessary – at least not on a 535i E34. I’ve tried both approaches but it’s very little room to maneuver the fan and clutch and you should be careful not to damage the fins on the radiator. 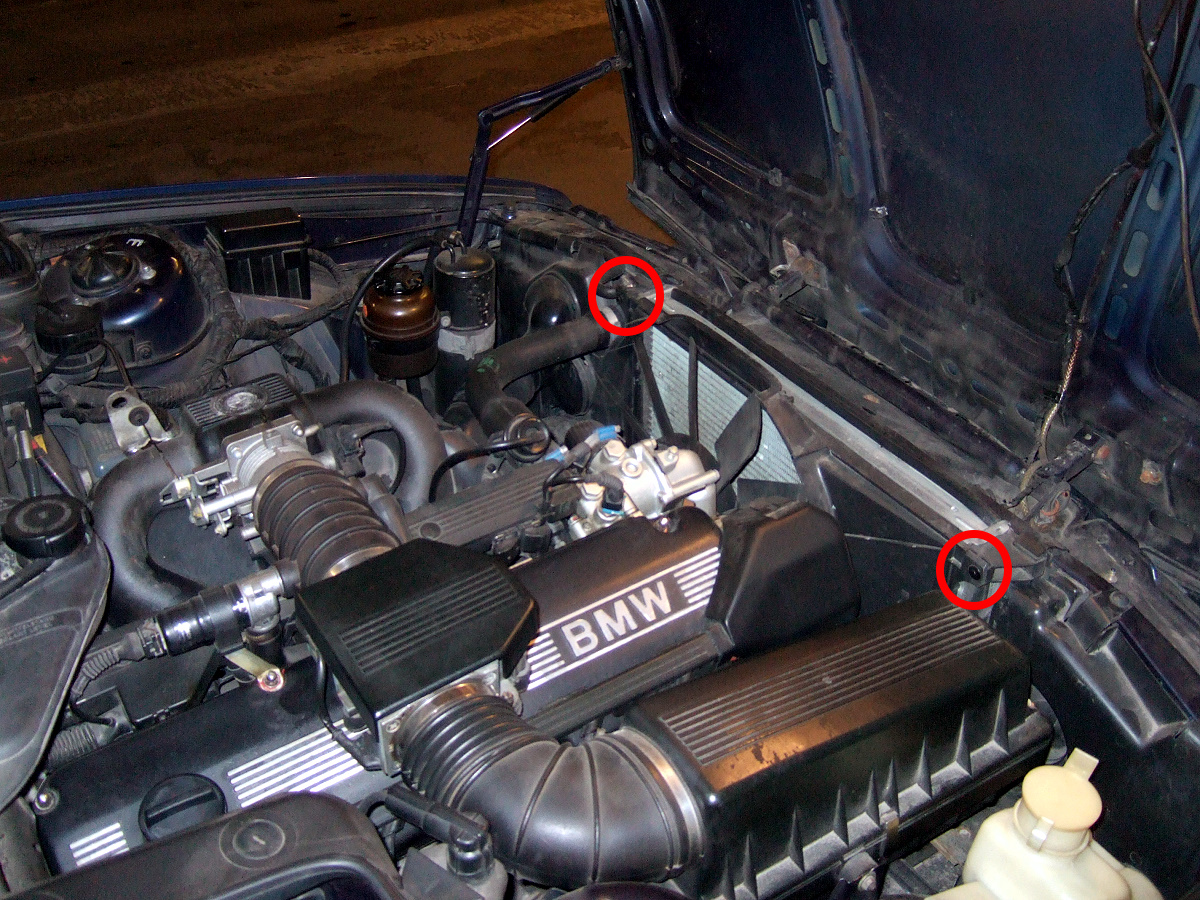 Engine bay of a 535i E34. The two plastic rivets holding the fan shroud in place are encircled. If you decide to remove the fan shroud, it’s held in place with two plastic rivets (see picture). Push out the middle pin a bit using a small flat-blade screwdriver on the other side (see picture) and then simply pull out the middle pin with any suitable tool. Then just pull out the other half of the rivet, it consists of two parts (see picture). 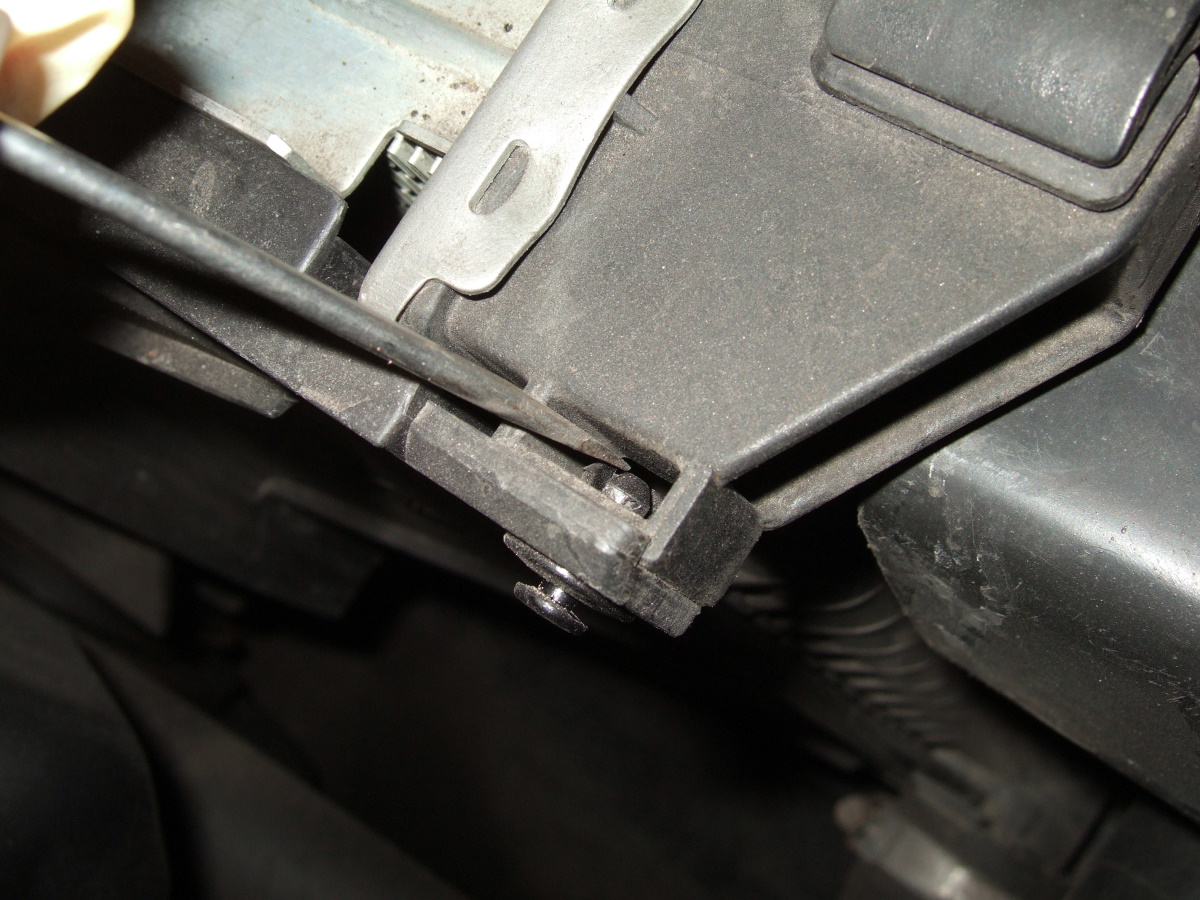 Push out the middle pin a bit by pushing it from the other side.  The plastic rivets consists of two parts, and they are reusable. Now you should remove the clutch from the water pump. It’s attached with a 32 mm nut that is left-hand threaded! Use a 32 mm open-end wrench and hit it with a hammer a few times (as seen in the picture) and the nut will come loose. Spin the fan off and lift the fan, clutch, and fan shroud straight up. Or if you didn’t remove the fan shroud, jiggle the fan and clutch up between the fan shroud and the engine. 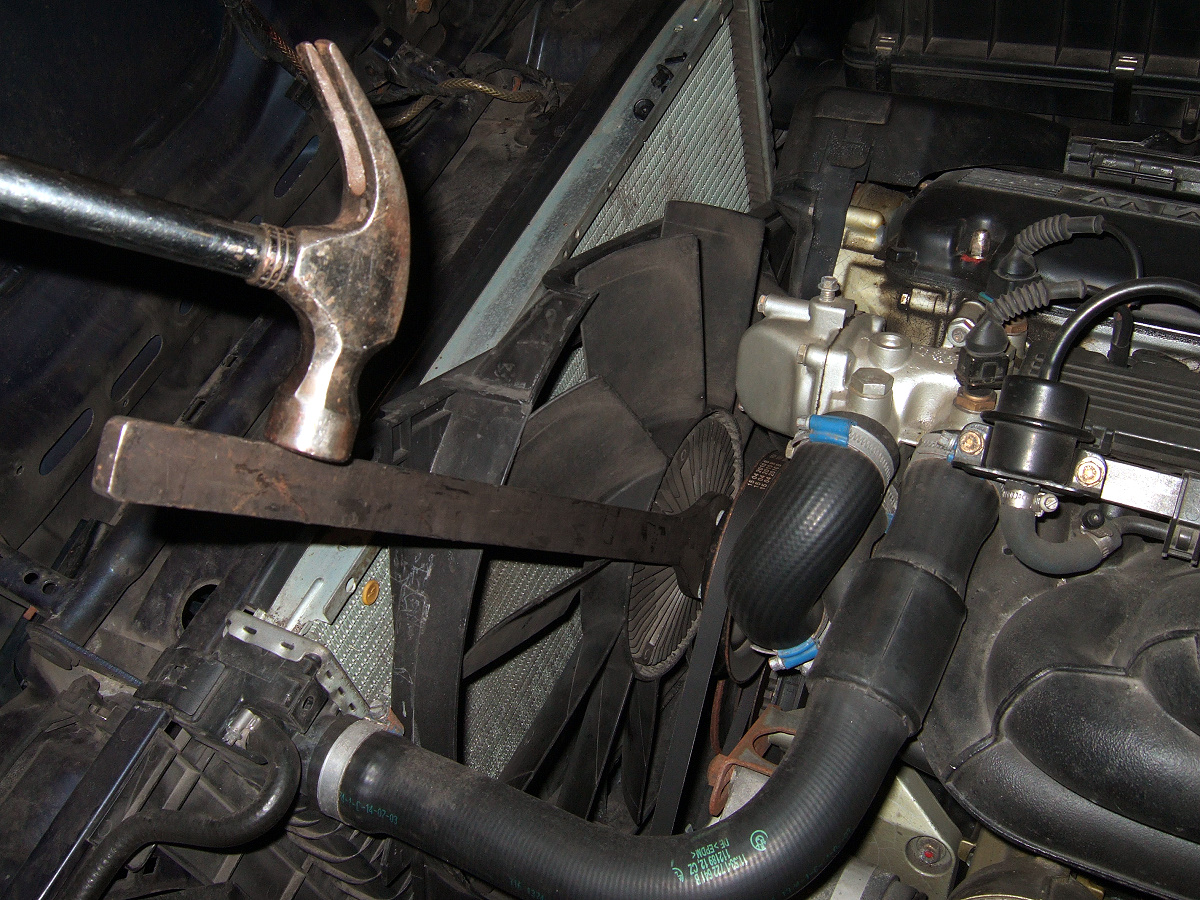 Use an open-end 32 mm wrench and a hammer to remove the nut. | Swapping The Viscous ClutchNow the package consisting of the fan and the clutch has been removed. The clutch on the 535i E34 is attached using three 5 mm Allen key bolts. Note that there exist at least four different types of clutches for the E34 series, so make sure you get the right one!  The viscous clutch is attached to the fan blades with three 5 mm Allen key bolts. Attaching the new viscous clutch is easy. Just remember to mount it correctly. The inner part of the fan blades with the small ridges should be on the same side as the viscous clutch, as seen in the picture. Don’t overtighten these small bolts, they should only be torqued with 10 Nm which isn’t much. To ease any future disassembling, dab a very small amount of anti-seize compound, like Loctite 8009 or similar, on the bolt threads. 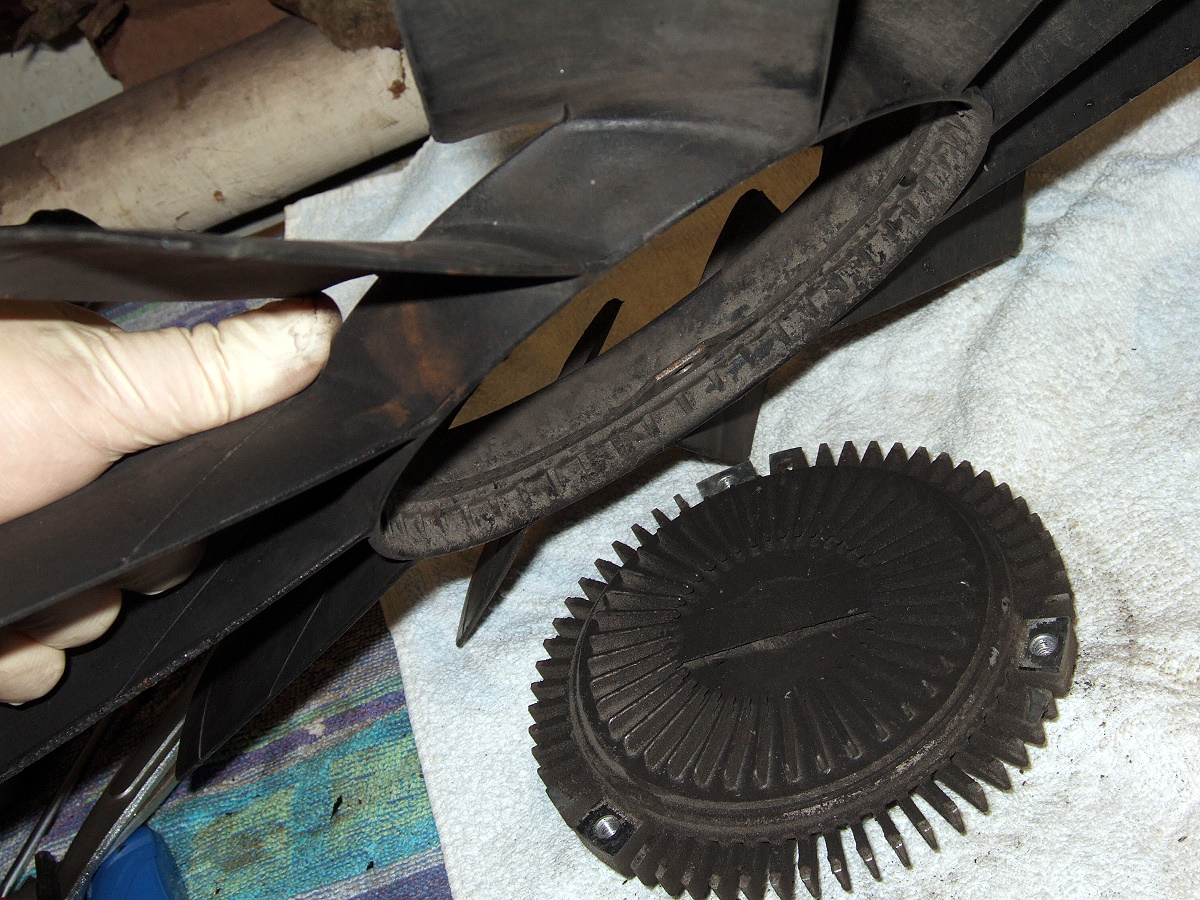 The inner part of the fan blades with the small ridges should be on the same side as the viscous clutch. Installing The Viscous ClutchInstalling is exactly like removing, just in reverse. Before installation, make a visual check of the fan blades for any damage, cracks, or even broken blades. A broken blade will cause the entire package to be unbalanced and will cause surprisingly large vibrations especially lower rpm’s.  Fan with a new viscous clutch ready to be installed. Tightening Torques
|