
Failure Symptoms:
When the front stabilizer bar links are worn out they usually make an annoying clink noise every time you drive over a bump. There could be of course other reasons for that clink noise but the front stabilizer bar links are often the cause and luckily they are easy to replace.
5 Series (1988-1995)
| floor jack | ||
| jack stand (2 pcs) | ||
| wheel nut wrench (17 mm) | ||
| Open-end wrench (16 mm) | ||
| socket (16 mm) (6-point) (1/2″) | ||
| ratchet handle (1/2″) | ||
| torque wrench |
Removing And InstallingThe front stabilizer bar links shall always be replaced in pairs. They are easy to replace and you must anyway raise both sides of the car – so there is no real excuse why not replacing both.
The spare parts consists of two stabilizer bar links and four self-locking hex nuts. Do not reuse the old nuts – buy new instead (which by the way is a lot easier to work with than the old rusty ones). 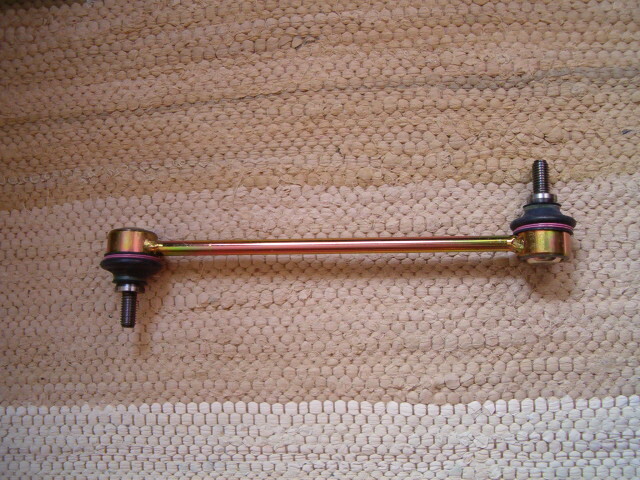 One new front stabilizer bar link (BMW Part Number : 31 35 1 134 582).
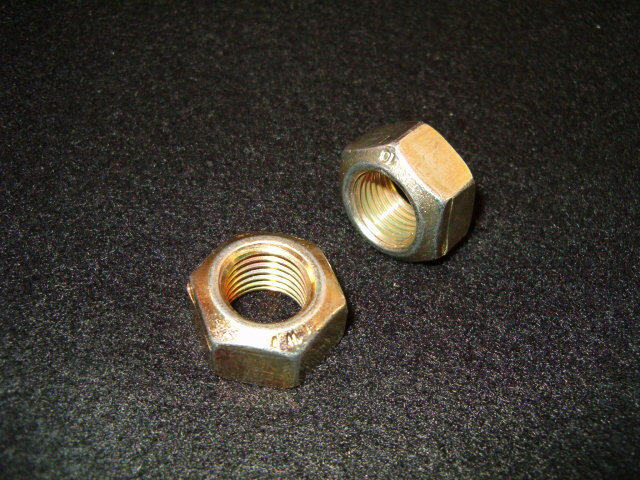 Two new self-locking 16 mm hex head nuts are needed for each front stabilizer bar link (BMW Part Number : 07 12 9 964 672). This job is easiest done with the wheels removed. Start by loosening (just slightly) the front wheel nuts and then raise the car and place it on two jackstands. Choke the rear wheels to secure the car from moving.
Do not – under ANY circumstances – work under the car without securing it with jackstands and choked wheels!
Note! Older parts from BMW had 16 mm grip and 17 mm self-locking nuts while the newer ones have 16 mm grip and 16 mm self-locking nuts. | Remove both front wheels to gain better access to the front stabilizer bar links. You need to raise both wheels from the ground – otherwise, you will put a load on the stabilizer bar which will make the removal harder. 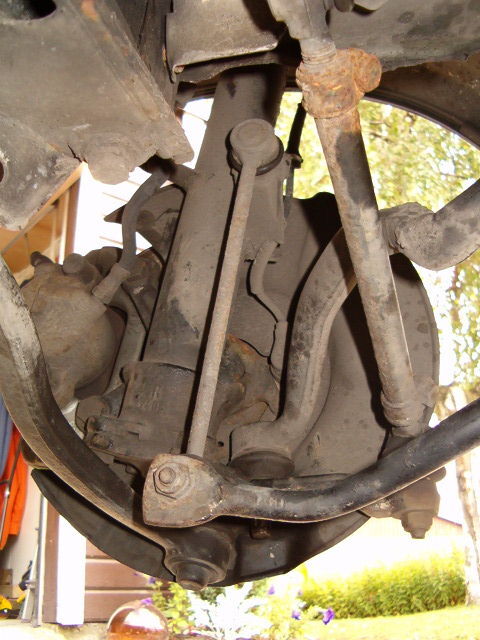 The front stabilizer bar link (see red arrow) which is located on the other side of the wheel hub. Now disconnect the stabilizer link from the spring strut. It is attached to the spring strut with a 16 mm hex head nut. The front stabilizer bar link attached to the spring strut with a 16 mm hex head nut (see red arrow). However, you need a counter hold to remove the nut otherwise it will just spin around in the ball joint of the stabilizer link. There is already a suitable location to apply a counter hold on the stabilizer link – a 16 mm grip between the rubber boot and the support. Just be very careful not to damage the rubber boot of the stabilizer link. 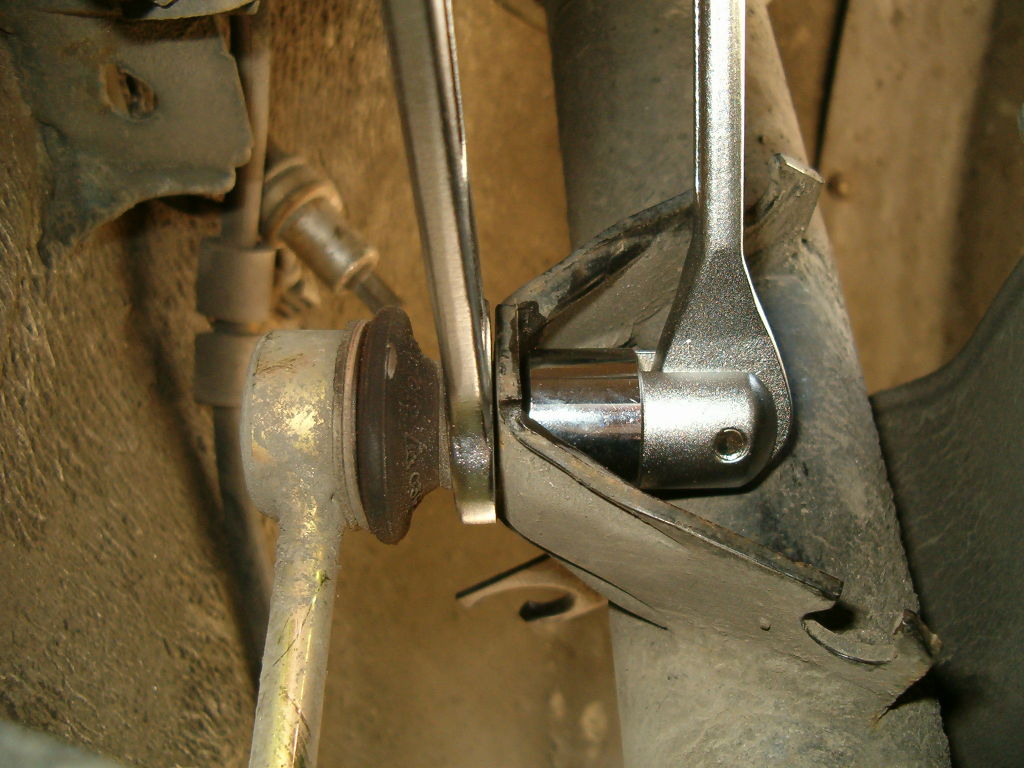 Use a 16 mm open-end wrench as a counter hold and a 16 mm socket and a ratchet handle (or swivel joint wrench as in the picture) to unscrew the nut. Next step is to do the same thing at the bottom where the stabilizer bar link and the stabilizer bar are connected to each other.
The installation is then the reverse of removal.
Tightening Torques
|